Showing posts with label photography. Show all posts

Tuesday, March 21, 2017

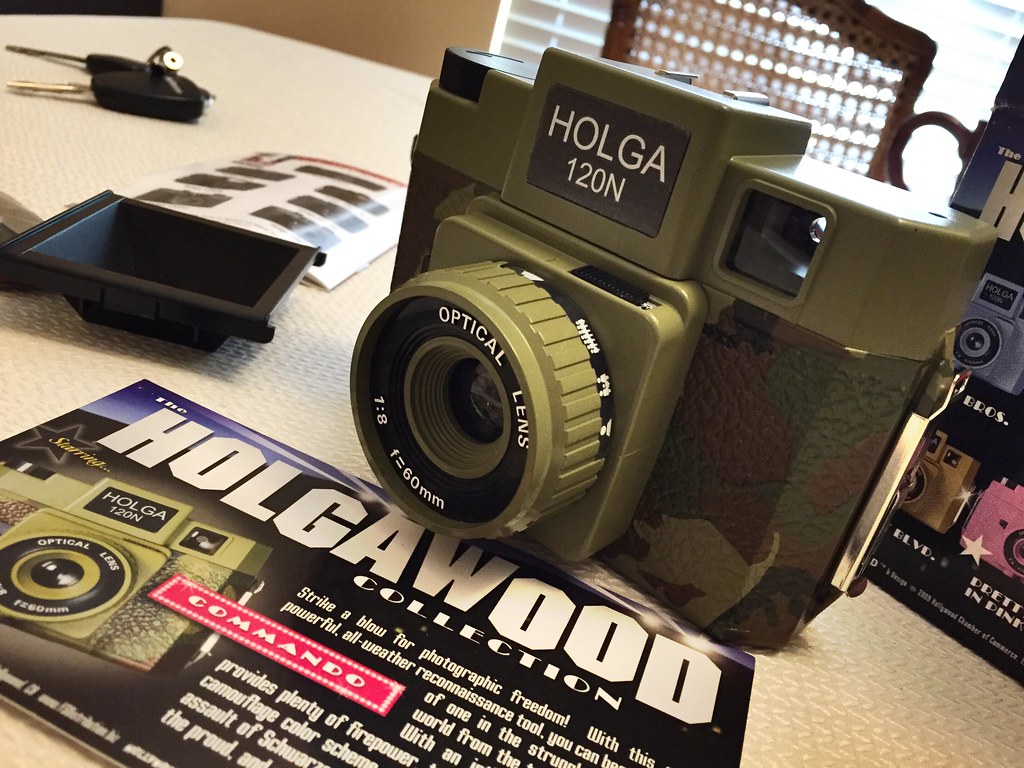
Going "Commando": My New Holga 120N

I'm not usually a toy camera kind of person. The couple that I have don't get much use, they're just not my style.  But I recently won third place in a photo contest, and my prize was this olive camouflage "Holgawood Collection" Holga 120N, called "Commando". With the factory having shut down, I figured that at least now I'll get a chance to use one of these infamous little cameras before they are nowhere to be found  (although now Freestyle says they're coming back?!).

Of course, I am aware of the Holga's "So Tragically Flawed It's Cool" status that makes it the darling of hipsters worldwide. In fact, even the user manual extolls the virtues of its plastic lens and probable light leaks as "stretching our visual perception" in ways a proper camera apparently cannot.  The idea of random uncontrollable light leaks as a feature rather than a problem makes little sense to me, and I certainly don't think I'll be using the Holga as a primary camera for "real" shooting, but I do sort of get the allure of an all-plastic zone focus toy that requires little or no effort.

Friday, February 24, 2017

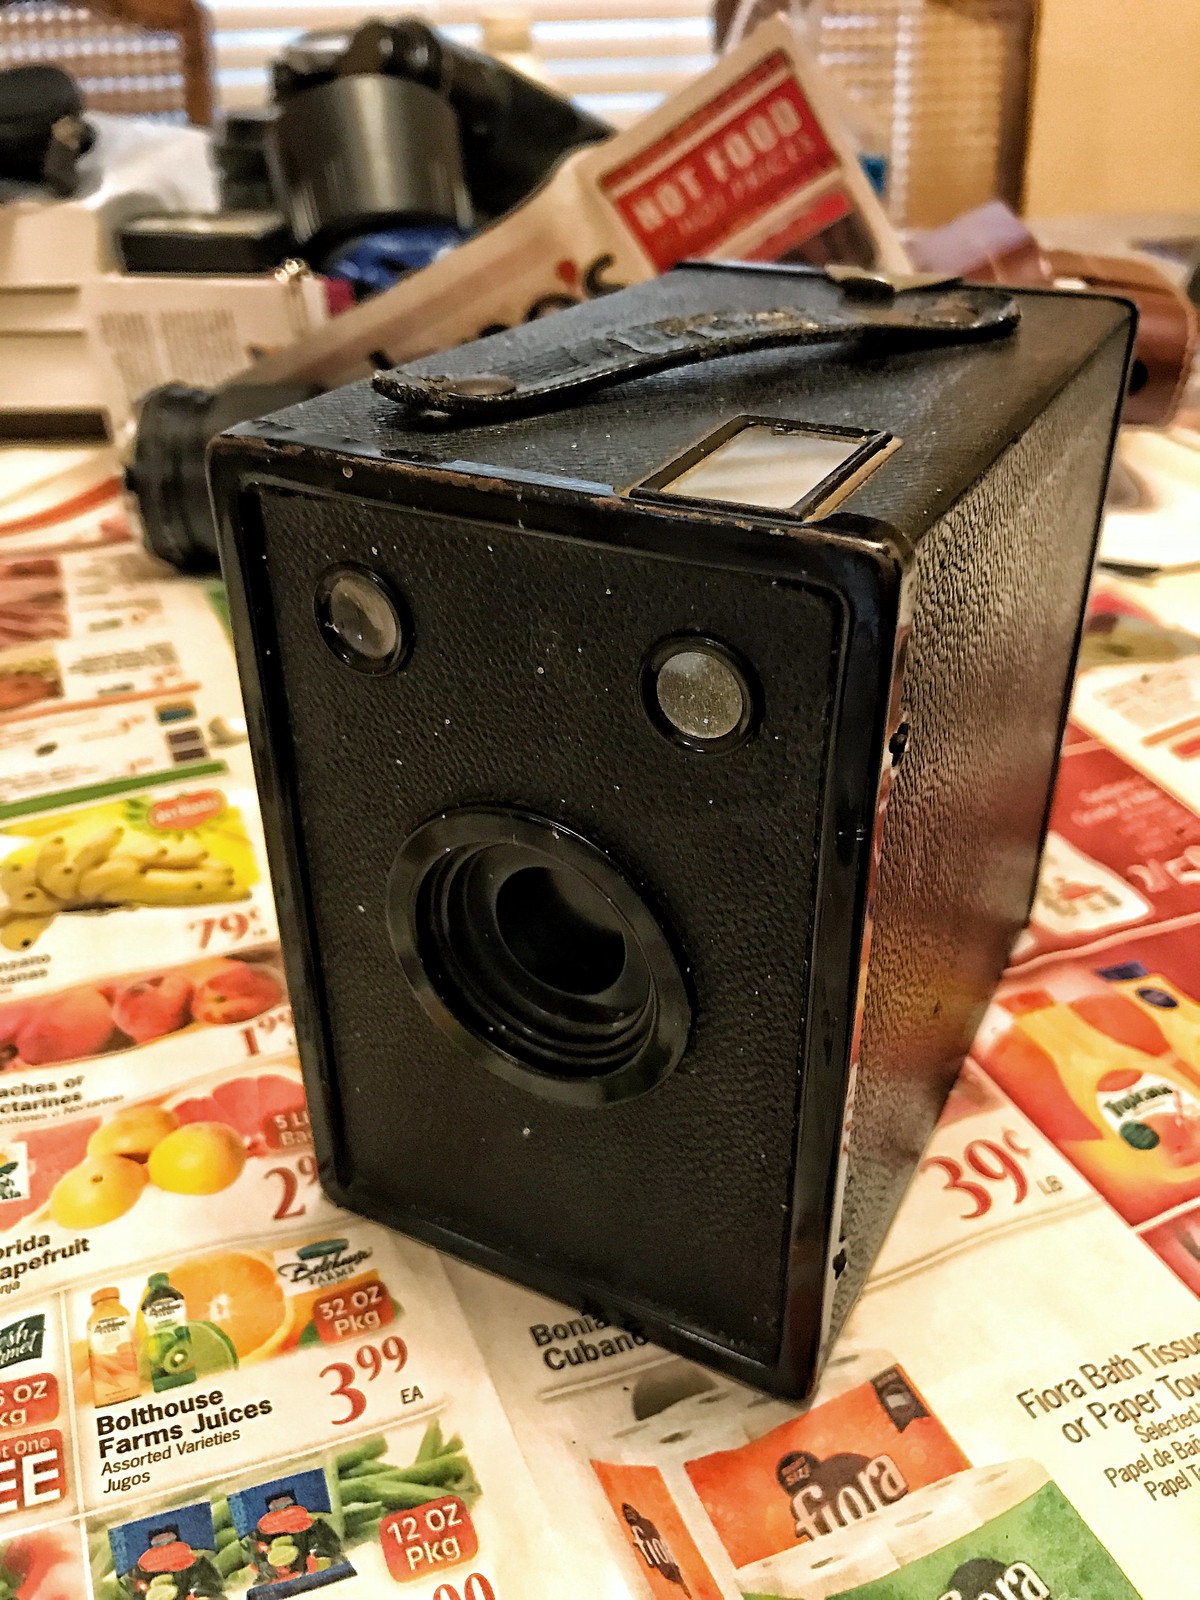
The Agfa Ansco D-6 Cadet

Agfa Ansco D-6 Cadet
A while back, I found a guy on Craigslist that was selling several random cameras out of a box in the trunk of his car. I think he was working for a thrift store and probably would collect some of the cameras that he ran across, using them as display pieces in his house. For whatever reason, he wanted to get rid of them so I met with him, rummaged through his stuff, and bought the entire box for $30. One of the 7 or 8 cameras in there was this box camera, an Agfa Ansco D-6 Cadet, which was produced from 1935 until 1941. Usually when I run across a pre-WWII box camera like this, it's a mess. The lens is missing or damaged, the winding mechanism is destroyed, etc.  In this case, it was just a little dirty. So I cleaned it up!


Wednesday, May 11, 2016

Film Photography & Digital Processing: Yes, You Should Edit Your Photos!

There seems to be a presumption, growing in popularity, that film photography is somehow more pure than digital photography. It's the idea that doing any processing on an image after scanning it from the negative is considered "cheating" because you're altering the image from its original, physical source. I'd like to try to clear up this misconception in my usual long-winded and rambling style.

Wednesday, January 27, 2016

Camera Review: Pentax K1000 (and Asahi SMC Pentax-M 50mm f/2)


The Pentax K1000 has a reputation for being a solid, no-frills SLR that will probably outlast your children. It's a pretty accurate reputation. I bought mine off of an ex-student that had taken a college photography class and (of course) moved right on to a digital camera. I paid $25 dollars for it and an Asahi SMC 50mm f/2.0 lens. I'm going to include the lens in this review because otherwise it would be quite short. Of course, if you're not interested in that lens you can ignore the appropriate parts.

Monday, January 25, 2016

Camera Review: Nikkormat FT2


Nikon FT2 with Nikkor 35mm f/2.0
Now that I've finally gotten some good use out of this camera, it's time for a review. The Nikkormat name was given to the consumer-level line of cameras manufactured by Nikon through much of the 1960's and 1970's. This particular model, the Nikkormat FT2, was manufactured from 1975 to 1977 as the successor to the FTn. So this camera is just about as old as I am. It's a metered manual camera, meaning you set the aperture and shutter speed yourself, and there are no automated modes available.

Tuesday, June 23, 2015

How Extension Tubes Work

There seems to be a lot of misconceptions out there regarding extension tubes and how they work, and if you're just getting started with them, it can be a little frustrating when you're not getting them to behave how you might expect.  I've talked a few people through it to clear up questions they had, so hopefully by writing up a post about it, it will help someone else one day.

Extension Tubes Are Just Spacers

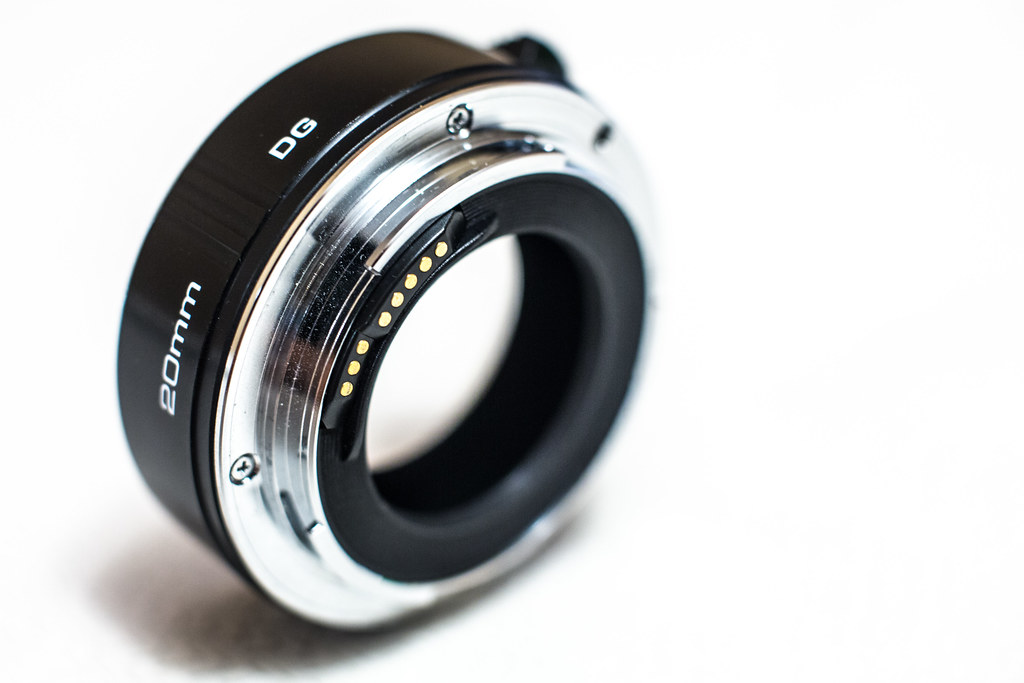
An extension tube
Some years back, I ran across several product reviews for a set of extension tubes that were unnecessarily negative. The main reason was because the users expected to be able to "zoom in" farther with these tubes to allow the subject to better fill the frame. What they were probably thinking of was a teleconverter, which introduces additional lens elements to effectively increase the focal length of the lens it's attached to.  Extension tubes are different.  They have no optical elements at all; their only purpose is to add additional distance between the lens and the film plane. If you really wanted to, you could actually make your own extension tube with a cardboard toilet paper tube! That's how simple they are.

Wednesday, June 10, 2015

Lightning Storm

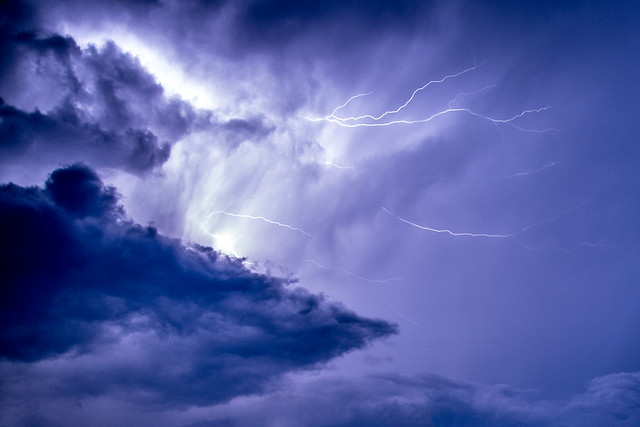
Lightning peeking out of a cloud formation (see larger image)
A recent trip out to Cedar Key, FL for a weekend saw a fortunate (if short-lived) opportunity to photograph a lightning storm passing near the shoreline at night. I've never really spent any time attempting to photograph lightning before, because I've always found myself in a less-than-desirable environment for it. So even though I didn't get that dramatic thick bolt reaching to the ground, I was happy to get what I got.

Wednesday, November 6, 2013

Scanning Negatives vs. Macro DSLR Copying

When I first started getting back into film after well over a decade of digital cameras, I ran across a guy that was absolutely convinced that no scanner could beat his method of "scanning" negatives and slides.  He would use a macro lens attached to his digital camera, and photograph the negative in sections, merging them in software later. He posted an outline of his method on this page.

Mount Dora Storefront
The test image, a number of books carved
into a storefront in Mt. Dora, FL.
I was intrigued by this (and his amazing results), and decided to give it a try myself.  I picked out a random black & white photo (to make reversal easier) that had a good sharp focus point on it. This photo was taken with my Mamiya C330 on Kodak TMax 400 film (120 format, 6x6).


I don't have an Epson V700, but I do have a Canon Canoscan 9000F Mark II to use as a comparison.  It doesn't support any transparency larger than 120 film, but at around $150, it's a fraction of the cost. I scanned the frame at a (pretty ridiculous) 4800 dpi, which resulted in an image that was around 11600x11500, or about 127 megapixels.  Of course, this is well beyond the limitations of the scanner's optics, but I will scale it down shortly for comparison purposes.

Wednesday, October 30, 2013

The Rokinon 14mm f/2.8 (And How to Correct Its Distortion)

Rokinon 14mm f/2.8 IF ED UMCThe Lens

 I've been getting some use out of the Rokinon 14mm f/2.8 (or  the Samyang 14mm f/2.8 or Bower 14mm f/2.8, these lenses are identical except for the name) lately.  It's the cheapest non-adapted lens that I currently own for the Canon EOS 5D Mark III, but really seems to hold its own against far more expensive options on the market.  It's also the widest angle rectilinear lens you can buy for a full-frame Canon DSLR. Anything wider than this is a fisheye.

Sure, you could also opt for the Canon 14mm f/2.8L II, which gives you autofocus and in-camera aperture control, but for those conveniences you'll be paying $2000 more than the price of the Rokinon. There are other lenses that I'd get more use out of that I'd rather buy with that nonexistent money.

Thursday, October 24, 2013

Taberna del Caballo

My success rate is much lower when I shoot film versus digital, partly because there's no safety net; I can't see if I've screwed up the photo until days later, whereas with a DSLR I can look and retake the photo immediately if I don't like it.

However, occasionally even I manage to get something right (at least, to my eyes).

Taberna del Caballo by jeffk42
Taberna del Caballo, St. Augustine, FL

Monday, September 9, 2013

Rolleicord In Montréal

I brought a much fuller set of camera gear to Montréal during my latest business trip in March and April. I previously didn't think I'd have the room to pack a full bag of DSLR gear and a second backpack containing my work laptop, but this time around I made it happen. In fact, I was even able to bring along my treasured little Rolleicord III by wedging into a space next to my laptop in the second backpack. While I didn't have quite as much play time as I had hoped on this trip, I still managed to get out a couple of times to enjoy the cold weather (I'm a Florida native so I can say "enjoy") and occasionally snap a photo or two. To be safe, I had all of the negatives processed before returning home, so there would be no chance of X-ray damage.

While I didn't really come up with anything amazing while I was shooting with this camera, I did end up with a couple of decent shots.  I think I might be too worried about being seen as something other than just a guy taking a picture, I don't know.  I always want to sit still for a while and concentrate on a scene, gathering information and finding the composition that best speaks to me.  Something about this bicycle spoke to me, with its odd mismatched brake levers and weird MacGuyver'ed rear mud guard, half buried in snow and forgotten over the long winter months in Montréal.  There was a great photo here, and I knew it as soon as I saw it.  But then I quickly started to feel self-conscious, wondering what those people down the street were thinking of this weird guy hanging out by someone's bicycle. Or wondering when someone was going to bust out running down the stairs with a baseball bat, mistaking me for a bike thief or creepy trespasser.  As a result of that insecurity, I ended up sticking around just long enough to meter the scene, dial it in, and fire off a shot without spending any time on composing it.  It left me with a photo that I didn't really love, and I still wonder what I would have ended up with if only I had spent more time.

Wednesday, May 29, 2013

Pinhole Music Video

I got a beautiful 6x9 wooden pinhole camera for my birthday this year, and while I haven't yet had an opportunity to run out and use it, I have been searching through the interwebs for tips on exposure, etc. I'll be posting about the camera once I have some time with it, but in my searching I found this video that I wanted to share.

It's a music video for London Grammar and the majority of it was shot with a handmade 360º circular rig that surrounds the subject. 35mm film is fed all the way around, and a cloth covering the 625 pinholes is lifted prior to firing a strobe as the subject makes their "move". The black-and-white negative film was then processed on-site in buckets filled with chemicals.


Wednesday, March 13, 2013

Rolleicord III (K3B) and Focusing Screen

My Rolleicord III, sitting there being all awesome.
The Rolleicord is certainly the camera that got me back into film photography.  My Rolleicord III (along with a Rollei 35 that will surely be the subject of a later post) was given to me as a gift from my stepdad when he was getting rid of some of his unused equipment.

At the time, I had just dug myself even deeper into the digital camp by selling my Canon EOS 5D Mark II and buying the updated Mark III, but I was excited by the unexpected gift and couldn't wait to try it out (even though I knew absolutely nothing about Rollei). Medium format went off my radar when I went digital in 2003 but ever since the day I bought my first 35mm SLR in 1992, it had been a dream of mine. If I had known that quality, affordable 120 cameras like this were around I probably would have started a long time ago!


If you are unfamiliar with twin lens reflex cameras, their operation and build is relatively simple compared to SLR's.  The lower "taking lens" projects the image onto the film when
the shutter opens, and the light from the upper "viewing lens" is projected upward via a 45-degree mirror onto a matte viewing surface which is used to focus and compose.

Thursday, March 7, 2013

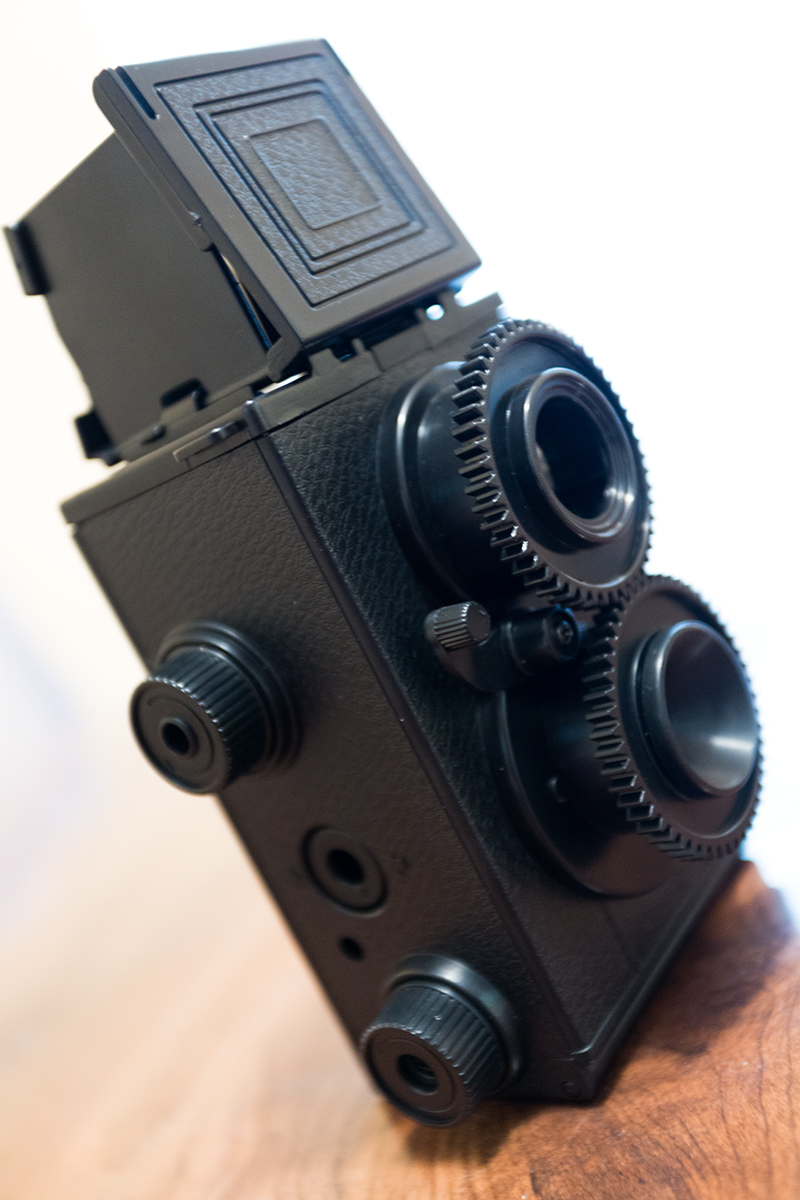
Recesky TLR DIY Kit

Recesky DIY TLR, assembled.
The Recesky DIY TLR fascinates me for some reason. It's basically a super cheap (about US$15) kit that resembles one of those inexpensive airplane model kits that you can get at any hobby shop. Everything is molded plastic, all in the same color, with a few springs and a bag of screws, and two plastic lenses.

Everything is reduced to its component parts, so I found it pretty interesting, especially building out the shutter mechanism. Of course it's tragically basic, but it was still cool to put it all together and see it work.

Once fully assembled, you have a basic, no frills TLR; it has a flip-up hood that you can open to expose the matte waist-level finder, which like any TLR is reflecting an image back from the viewing lens (in reverse). The two lenses are linked by gear teeth so that when the viewing lens is being focused, the taking lens is focused by the same amount.

The shutter trips at what I can only imagine is a somewhat approximate 1/125 second, it's basically a spring-loaded piece of plastic that swings out and springs back when you press down on the shutter release lever, located at the front of the camera.  The aperture is fixed at f/11, so really the only actual exposure control you have is changing up the film speed when you switch rolls.